Best Screen Capture Software For Mac 2017
Disk Management is another Xbox One hard drive format tool to make Windows recognize hard drives. But when an Xbox One external hard drive is connected, no partition is displayed. You need to initialize the hard drive first and then recreate. Select the Xbox One external hard drive which shows as “Disk Unknown Not Initialized” and choose Initialize Disk from the context menu. Then choose a partition style and confirm.  Partition external hard drive to use for Mac and Xbox One? I have a 1TB hard drive that I use as my Macbook backup (which I'm willing to erase and back up again if needed). Does anyone know if it's possible to partition it so I can use it to back up my laptop as well as store games? As for external hard drives, you can't partition them for use as both external storage for games and for use with your Mac or PC. You can use an external hard drive on the Xbox One as a media drive, though. If you format an external hard drive for Xbox One games storage, the whole drive is formatted and the file system is changed. Toshiba Canvio Basics 1TB: Best External Hard Drive For Xbox One. Looking for the best portable drive to extend your storage? The Toshiba Canvio Basics is the best 1TB Portable Hard Disk Drive for Xbox One and PC. It’s slightly bigger in size from the deck of cards. There are two methods that can create a partition on Mac. One is using Disk Utility and the other is using Boot Camp. Just keep reading! Method 1: Use Disk Utility to Partition A Hard Drive on Mac. The first way to do the disk partition on Mac is to use Disk Utility, which can repair and partition disk drive spaces from your Mac.
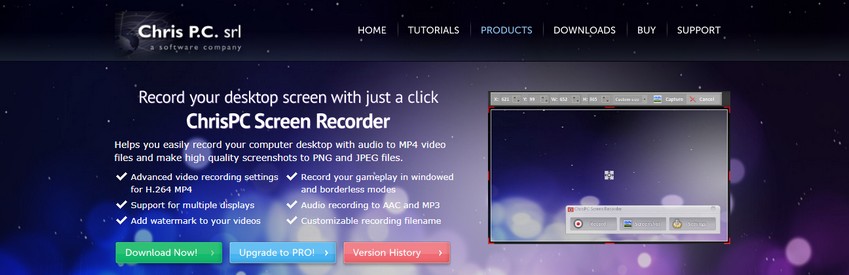
Have you wondered how you can record any ongoing activity, for example, live streaming video, Google Hangouts conversation, Yahoo Messenger call, remote desktop session, YouTube hot movie, etc, on your Mac screen without sacrificing original quality? There is no need to think it for a long time. A decent screen recording program for Mac is able to make any desktop video and audio to be captured possible. Faced with a large number of screen captures, you may hesitate to pick up one from them to use. After looking through this review to compare top-listed 6 best screen recording software for Mac, you will know which one can hit your preferences completely.
Download and install the best free apps for Video Capture Software on Windows, Mac, iOS, and Android from CNET Download.com, your trusted source for the top software picks.
Use Shift-Command-5 in macOS Mojave
With macOS Mojave, press Shift-Command (⌘)-5 on your keyboard to see all the controls you need to record video and capture still images of your screen. Use these onscreen controls to select whether to record the entire screen, record a selected portion, or capture a still image of your screen. If you haven't upgraded to Mojave, you can record the screen with QuickTime Player.
Record the entire screen
- Click in the onscreen controls. Your pointer changes to a camera .
- Click any screen to start recording that screen, or click Record in the onscreen controls.
- Use the thumbnail to trim, share, save, or take other actions.
Record a selected portion of the screen
- Click in the onscreen controls.
- Drag to select an area of the screen to record. To move the entire selection, drag from within the selection.
- To start recording, click Record in the onscreen controls.
- To stop recording, click in the menu bar. Or press Command-Control-Esc (Escape).
- Use the thumbnail to trim, share, save, or take other actions.
Trim, share, and save
After you stop recording, a thumbnail of the video appears briefly in the lower-right corner of your screen. Age of empires ii for mac.
- Take no action or swipe the thumbnail to the right and the recording is automatically saved.
- Click the thumbnail to open the recording. You can then click to trim the recording, or click to share it.
- Drag the thumbnail to move the recording to another location, such as to a document, an email, a Finder window, or the Trash.
- Control-click the thumbnail for more options. For example, you can change the save location, open the recording in an app, or delete the recording without saving it.
Change the settings
Click Options in the onscreen controls to change these settings:
- Save to: Choose where your recordings are automatically saved, such as Desktop, Documents, or Clipboard.
- Timer: Choose when to begin recording: immediately, 5 seconds, or 10 seconds after you click to record.
- Microphone: To record your voice or other audio along with your recording, choose a microphone.
- Show Floating Thumbnail: Choose whether to show the thumbnail.
- Remember Last Selection: Choose whether to default to the selections you made the last time you used this tool.
- Show Mouse Clicks: Choose whether to show a black circle around your pointer when you click in the recording.
Use QuickTime Player
QuickTime Player also has a screen-recording feature, and you don't need macOS Mojave to use it.
- Open QuickTime Player from your Applications folder, then choose File > New Screen Recording from the menu bar. The Screen Recording window opens.
- Before starting your recording, you can click the arrow next to to change the recording settings:
- To record your voice or other audio with the screen recording, choose a microphone. To monitor that audio during recording, adjust the volume slider (if you get audio feedback, lower the volume or use headphones with a microphone).
- To show a black circle around your pointer when you click, choose Show Mouse Clicks in Recording.
- To record your voice or other audio with the screen recording, choose a microphone. To monitor that audio during recording, adjust the volume slider (if you get audio feedback, lower the volume or use headphones with a microphone).
- To start recording, click and then take one of these actions:
- Click anywhere on the screen to begin recording the entire screen.
- Or drag to select an area to record, then click Start Recording within that area.
- To stop recording, click in the menu bar, or press Command-Control-Esc (Escape).
- After you stop recording, QuickTime Player automatically opens the recording. You can now play, edit, or share the recording.
Learn more
- When saving your recording automatically, your Mac uses the name ”Screen Recording date at time.mov”.
- To cancel making a recording, press the Esc key before clicking to record.
- You can open screen recordings with QuickTime Player, iMovie, and other apps that can edit or view videos.
- Some apps, such as DVD Player, might not let you record their windows.
- Learn how to record the screen on your iPhone, iPad, or iPod touch.